Interior Design · Sewing projects · Soft Furnishings

Promises, promises…

Bunting and beanbag
Ahhh!

I had lots of fun a couple of weeks ago taking photos of my friend’s beautiful little girl sitting on a gilhoolie beanbag and pouffe (with some bunting in the background). Thank you so much Sandi, I may ask again if that’s okay!

I know the model looks gorgeous but I’m also hoping these photos show my products well enough to start selling on-line now. I must admit I did get a bit carried away and didn’t always manage to get the whole of the beanbag in shot, oops! Ah well, I still have lots to learn. Thank you also to James for playing around with the photos in Photoshop; I think they are very professional and just the look and feel I was going for.

It’s taken a bit longer than I expected to set up my folksy shop but I think the photos are incredibly important. I’m going to take some more of my lampshades this week too as I’m not happy with the ones I already have. When you work for yourself it’s easy to not set deadlines and just go with the flow but I promise these will be on folksy by the end of the week, cross my heart and watch this space for details!

pouffe
Just chilling!
Interior Design · Sewing projects · Soft Furnishings

Birds, owls, hearts and bunting…

Birds, owls, hearts and bunting

Like I said yesterday, I’m nearly there now and even made some bunting today to go on my stall to make it look pretty. I used scraps from the other things I’ve made so it all ties in together and it was the easiest thing to do. Honest, if you like bunting (which I do) then there aren’t many easier things you can sew; all in less than an hour; so satisfying!

The birds, owls and hearts are all filled with lavender (took a while to do, thank you Caroline for donating the lavender!) Again, that was a bit of a family activity at the weekend as the boys enjoyed pulling the heads off the dried lavender plants in between painting their chalkboard signs and riding round the garden on their bikes!

Interior Design · Sewing projects · Soft Furnishings

Two pouffes and a bag…

Two pouffes and gilhoolie label

I’ve been busy making things to fill my stall next Thursday and  I think I’m nearly there, thank goodness. Here are two of the gilhoolie pouffes. The bright one on the left is made from Amy Butler fabric (I have some left over so will probably make a lampshade with that) and the one on the right is made from fabric I already had from our hall curtains and cushions. I’d like to be able to make them from the fabrics I have in stock for lampshades as well as bespoke to match an existing colour scheme, perhaps in a living room or child’s bedroom.

gilhoolie bag
gilhoolie bag

Also, some of you will be pleased to hear…. I made another gilhoolie bag. This time I went back to the simpler design but I incorporated some of the details from the Tabitha bag I made last week with a coloured trim and patterned inside of the handle. I had a play with making flowers and bows to decorate the bag but ended up going back to the covered buttons to keep the look simple. The bows and flowers are always an option though as they did look pretty.

Now that’s all done I’m ready to start putting some things on folksy ready to sell, well almost. I just want to finish off the birds and hearts I started making last week and some bunting to decorate my stall, oh yes and a gilhoolie sign. We had lots of fun at the weekend, James cutting MDF and myself and the boys painting the boards with chalkboard paint; they even have one each for their rooms, one in the shape of a car and one a guitar!

Interior Design · Soft Furnishings

Flower power!

flowerpower lampshades
Flower power lampshades!

As we’re having a second summer this week, I just had to show you these flowery lampshades I made from Amy Butler and Heather Bailey cotton fabric. They measure 20cm in diameter by 18cm high but I’d like to see them on a big drum lampshade, hopefully someone else will too?!

It’s been a lovely week; not just because the sun’s shining; I’ve had so much fun making lovely things. Next on my list are another bag and a pouffe. Hopefully soon I’ll be all stocked up for my stall in three weeks time…

Interior Design · Sewing projects · Soft Furnishings

‘a’ is for…

Alice, Amiee, Asha, Amelia..

Matching gilhoolie beanbag and lampshade

I made a beanbag yesterday in indigo denim fabric with a personalised pocket. The idea is you can choose a fabric and your letter to have sewn onto the beanbag. The beanbag itself is a pyramid shape with a square base and a handle at the top (plus a zip in the bottom for refilling and the seams are all top-stitched for extra strength). I made them for my boys earlier in the year and they (and the cat) are always on them so they must be okay!

I’m pleased with the result but in the middle of stitching on the ‘a‘ and struggling to go round the corners, I did think it would have been much easier to start with an ‘l‘!

Ah well, it was good practice and I think the pocket goes nicely with the adorable lampshade I made at the weekend…

Interior Design · Sewing projects · Soft Furnishings

A quick update…

Just thought I should put a quick update on gilhoolie as I haven’t blogged for ages, I’m still here! The last couple of weeks have been spent doing lots of screen-printing (some prints more successful than others, arghhh) as well as lots of behind the scenes preparation for getting started on selling things. I’m hoping to have a stall at a shopping evening at school next month so I’ve been concentrating on that by putting together some marketing materials and thinking about how to display everything. I also want to start selling on-line on folksy before then, so I’ve been writing a biography to set up a gilhoolie shop. So you see I have been quite busy really!

I’ve made some lampshades from my own designs (shown below) but also just ordered some pretty fabric to make some more. I’ve decided to not just make things exclusively from my own hand-printed fabric but instead to experiment with any other fabric that catches my eye. I’ve also ordered more denim fabric for making beanbags and bags. The designs will be made to order with a choice of fabrics for bag linings, beanbag pockets, pouffes and accessories (buttons and bows on bags). I’m really looking forward to receiving the fabric I’ve ordered as I’ve missed sewing and I’m getting impatient to start selling soon!

I’ll let you know as soon as my folksy shop is set up, watch this space…

folksy logoBusy, busy!

Busy, busy!
Interior Design · Soft Furnishings

A new toy…

Well, writing a business plan is going okay but I’m taking a break from Excel spreadsheets (reminds me too much of my old job!) to play with a new toy – a proper camera!

Thank you Neil and Angela for putting us up in your lovely new house last week and for giving me your old Canon digital camera. I really, really appreciate it and will try to repay you by sending interior design ideas for all those big rooms whenever I see any!

I’ve taken a few pictures of my tulip lampshade to see if I can make it look any better. Yes, I’ve got lots to learn; I’m not sure I’ve got the hang of focusing on the right part of the picture (not a good start!)     I really should read the instructions beforehand but I wanted to have a play. Come on, they’ve got to look better than the old ones, surely?! I also need to practice setting up shots to make things look more professional but I’m sure when I have several lampshades set up in different designs and colours they’ll look ten times better.

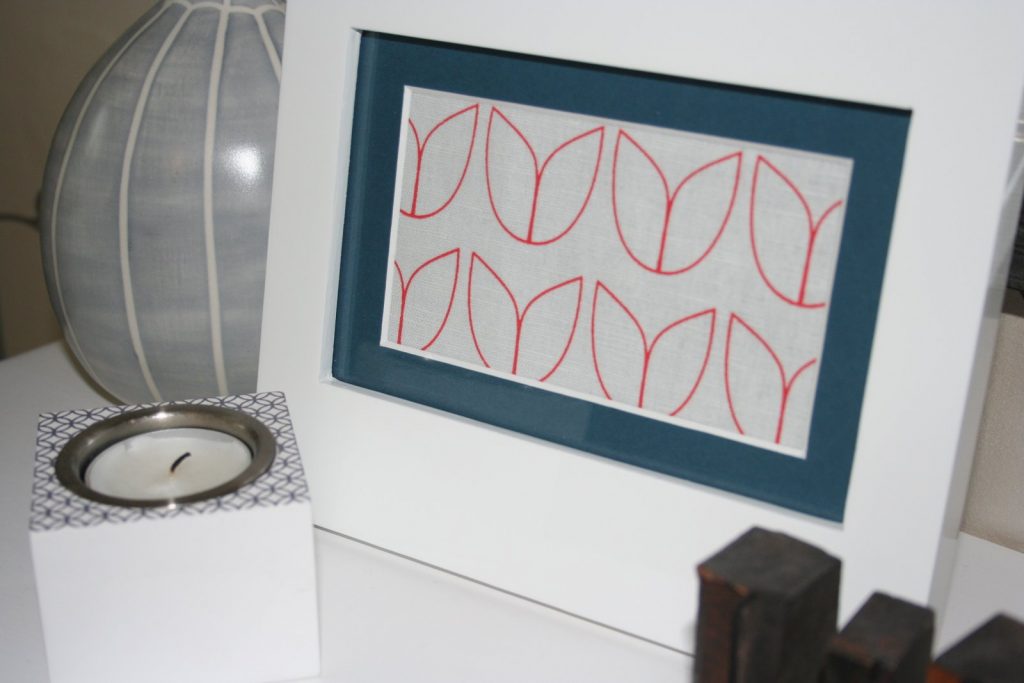
I bought a frame today to display a sample of of my first printed tulip fabric so that I can look back and remember where it all started:

gilhoolie tulip in a frame

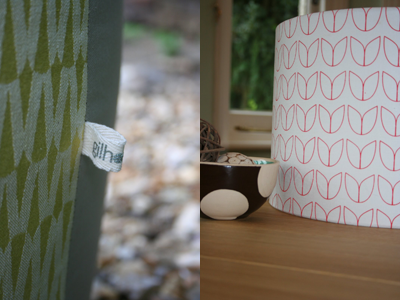
And here’s a gilhoolie label close up, can you see it now?! Oh yeh, and here’s my lampshade of course. Now I’m off to finish working out costings for lampshades, tea-towels and beanbags, oh and to read that camera manual…or maybe just play a bit more first… P.S. Did anyone spot the difference in the header on my blog?

gilhoolie label and lampshade
Interior Design · Soft Furnishings

It’s oh so quiet…

Bjork – It’s oh so quiet

Quiet in terms of posting on here but not so still as the boys are on summer holidays for six and a half weeks! However, I have moved on a lot since school broke up – I collected my A4 screens, practiced printing fabric and even made a lampshade with it today – yippee!! I’ve been so excited I haven’t been sleeping well, but hopefully I can sleep soundly tonight now that I have a gilhoolie tulip lampshade sitting pretty in our front room.

Here’s what I did (I’m making an effort to give you more detail this time as I can’t blog as much right now and people have been asking what it all involves).

I changed the old gilhoolie tulip design as I decided it was too complicated and I wanted something a lot less fussy. I’m still planning to print with the butterfly and windmill designs but this is actually my favourite so far.

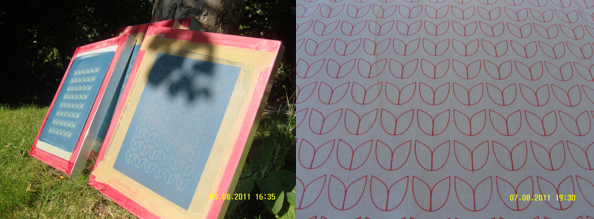
3 screens and gilhoolie tulip fabric

Here are the three silk screens I’m going to use to print with and the tulip fabric on my printing table (worked brilliantly, thank you James!) This is for our living room so I chose a coral colour to contrast with the duck egg blue walls (it was all looking a bit too blue and grey for my liking). I just need to find some small matching accessories to complete the scheme. Although I originally wanted to go for pastel shades I think the tulip and windmill patterns are more suited to bolder colours as the lines in the designs are quite fine. Lots to learn but the only way to come up with final designs I’m happy with is to experiment.

SAMSUNG DIGITAL CAMERA

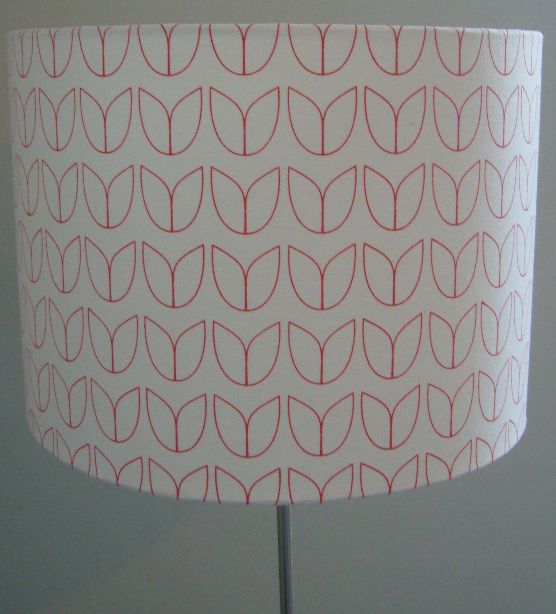
Then I used a strip of the fabric and a lampshade making kit and wham boom! (Bjork again) you have a gilhoolie tulip lampshade! That bit was easy really and the end result looks very professional so if you want to make your own lampshades give it a go.

I’m hoping to start printing and making lampshades, tea-towels and beanbags with screen-printed pockets from September for a shopping evening at school so my next task is to put together a business plan, how hard can it be?! Arrghh!

Decorating Projects · Interior Design

Did you know John Lewis sell disco balls?!

Walls, ceiling and woodwork painted, fire surround painted, fireplace tiles painted, shelves put up, wallpapering done, mirror put back, new light put up… not a quick job this one but worth it in the end! I can’t believe how much lighter the room feels now that it’s a cool duck egg rather than a dark red.

The floral wallpaper is called Hudson Mohair from Laura Ashley and has a pearlescent sheen (not available any more though so the pressure was on when we were trying to wallpaper round the fireplace!)

Front roomThe Dante chandelier is from John Lewis and has already been described as a disco ball by my five year old but I’m hoping it adds a bit of glamour and impact to the room.

My last task is to frame some pictures I’ve been collecting for the wall behind the sofa which is looking very empty – more photos of the rest of the room to follow, I just thought I’d do a quick update now.

Even the beanbags I made back in March match the scheme…

Decorating Projects · Interior Design

The red has to go!

Living room - before

Well, while I’m waiting for my delivery of inks, screens and squeegee I thought I’d make a start on decorating our living room. I have to admit I’ve been putting it off as there’s lots to do but now is a perfect time and I need another project to get stuck into. Here is a photo of the room – I hate the red wall and I don’t really like the tiles round the fireplace plus the shelves aren’t brilliant, see what I mean, lots to do!

Living room mood board
Mood board

I’m not going to bother with a floor plan this time as the furniture can only fit one way. I have put together a mood board though. If you’re thinking about changing the scheme of a room this is a really good way to start as it helps you visualise the kind of feel you want to achieve in the end. In this case I’m going for blues, greys and whites to make a calming room with natural colours and textures. I’ve been collecting cards and pictures of all different sizes to put in frames on one wall and have already made a cushion so I’ve been thinking about the scheme for some time. I even have the wallpaper already (to go on one wall); another reason to get started in case I don’t like it in a few months time!